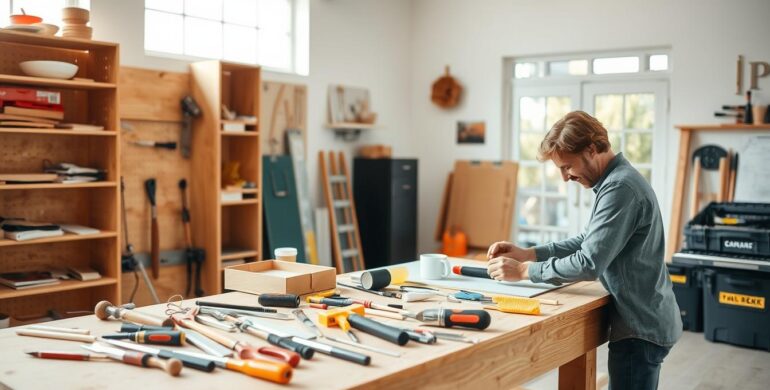
Starting DIY home improvement as a beginner can be fun and save money. It’s a way to make your home better. You can add value to your home or just make it look nicer. Even without much experience, you can change your home with simple ideas. This guide shows easy projects for DIY newbies. It gives tips and steps to do well. By changing fixtures or adding decorations, you can make big changes that don’t cost much.
Key Takeaways
- DIY home improvement projects for beginners are both rewarding and cost-effective.
- Simple home improvement ideas can significantly enhance your living space.
- Projects discussed include low-skilled updates and decorative changes.
- Practical advice and step-by-step guides help ensure successful execution.
- Focus on budget-friendly DIY projects to make impactful home improvements without overspending.
Replacing Cabinet Pulls
Changing cabinet pulls is a great starter project for beginners. It’s an easy way to change how your kitchen or bathroom looks. It doesn’t cost much either. If you want to make your space look modern or elegant, try this! It’s perfect for those new to DIY.
Why it’s a Great Starter Project
This project is great for beginners because you don’t need special skills or tools. Thomas Borcherding, a home remodeling expert, says changing pulls can make your cabinets look and work better. It also makes a big difference in how your room looks, which feels rewarding.
Essential Tools You’ll Need
You only need a few tools to start:
- Screwdriver: It’s important for taking off old pulls and putting on new ones.
- Cordless Drill: This makes the job faster, which is great for many cabinets.
- Measuring Tape: It helps make sure the new pulls go in the right spot.
Once you have these tools, you’re ready to tackle this DIY project confidently.
Painting a Room
Painting a room can make it feel new and lively. This DIY home project makes your space look better. It also makes you proud of what you have done. If you’re starting with beginner DIY home decor, picking the right paint matters a lot. Knowing how to paint is key too.
Choosing the Right Paint and Color
Picking the right paint and color is important. Think about what the room is for and the feel you want. Soft colors are good for a calm bedroom. Bright colors bring energy to living rooms and kitchens. The paint’s finish should also be thought of for lasting strength and easy care.
Step-by-Step Guide to Painting
Are you ready for a big change that’s easy to do? Here’s how to get a professional look step by step:
- Preparation: Move furniture out and protect floors with drop cloths. Make sure the walls are clean.
- Priming: Put on primer if the wall is dark or if it’s new drywall. Primer helps paint stick better and look smooth.
- Cutting In: Paint carefully around edges with an angled brush. This is called cutting in. It makes edges look neat.
- Rolling: Use a roller for big wall areas. Move in a ‘W’ shape for even paint.
- Second Coat: Let the first layer dry well. Then, add another if needed for a nice look.
- Cleanup: Take off any painter’s tape. Clean up your brushes and rollers well.
Painting a room yourself can make you ready to try more DIY home projects. It refreshes your place. It’s also a good starting point for more beginner DIY home decor ideas.
DIY home improvement projects for beginners
Starting home renovation projects is exciting for new homeowners. It’s rewarding, too. With some easy projects, you can make your home look and work better.
Start with Basic Plumbing. You can fix a leaky faucet or unclog a drain. These are easy and make a big change in your home.
Try some Simple Electrical Tasks next. You could change light fixtures or add dimmer switches. But remember to turn off the power first.
Easy Carpentry is another good step. Try building a shelf or fixing a cabinet door. It’s a good way to learn without getting overwhelmed.
| Project | Skills Learned | Estimated Time |
|---|---|---|
| Fixing a Leaky Faucet | Basic Plumbing | 1-2 hours |
| Changing a Light Fixture | Simple Electrical Tasks | 1 hour |
| Building a Small Shelf | Easy Carpentry | 3-4 hours |
Start with these easy projects to make your home better. And you’ll learn a lot, too. Remember, start simple and slowly move to harder projects.
Building a Fire Pit
Creating a fire pit is a great outdoor DIY project. It makes your backyard better. You learn about working with stone and concrete. Plus, you get a cozy spot for friends to gather. It’s a simple home improvement idea that’s both useful and beautiful.
Start by picking the right spot. Make sure it’s at least 10 feet away from buildings. But 80 feet away is even better for safety and space. Mark a circle where you’ll dig 1.5 feet down. Leave 2-3 inches at the top for drainage and to keep seats stable.
Build the fire pit walls with 48 trapezoid blocks and 48 mini blocks. Make it four layers tall. This way, it’s strong and big enough for fires. Think about adding a path to it. Using crushed limestone makes it look natural.
For seating, outline the area with 80 feet of landscape edging. Cover it with fabric to stop weeds and keep it clean. Use 7.5 tons of crushed limestone for a solid ground. This costs about $535. It’s a budget-friendly DIY project to upgrade your yard.
Want to know how to do it all? Check this full guide here. It’s easy for beginners to follow.
Installing a Wall-Mounted Television
Make your living space better by putting up a wall-mounted TV. It’s a top choice for an easy DIY tech upgrade. It makes your space look cleaner and more together.
Necessary Tools and Materials
Make sure you have everything needed:
- Stud finder
- Drill and drill bits
- Level
- Wall mount bracket
- Screwdrivers
- Pencil
- Painters tape (optional)
- Cable management kit
Step-by-Step Installation Guide
Do these steps for a great DIY tech upgrade:
- Choose the Right Bracket: Pick a bracket that fits your TV’s size and weight.
- Locate Wall Studs: Use a stud finder to find studs in the wall for the TV.
- Mark the Mounting Points: Put the bracket on the wall and mark where to drill. Check if it’s level.
- Drill Pilot Holes: Drill holes on your marks to prepare for the screws. This helps attach the bracket well.
- Install the Bracket: Screw the bracket to the wall and make sure it’s tight.
- Mount the TV: Lift up the TV and hang it on the bracket. Make sure it’s safe.
- Manage Cables: Use a cable kit to keep wires tidy. This makes everything look neat.
Finishing these simple DIY projects improves your space and teaches you useful skills for later.
Replacing a Torn Window Screen
Fixing a torn window screen is easy and affordable. It improves your home’s look and feel. Every new homeowner should learn this to keep bugs out and air flowing. We’ll show you the tools needed and how to do it step by step for a perfect fit.
Tools Required
- Spline Roller
- Screwdriver
- New Screen Material
- Scissors or Utility Knife
- Measuring Tape
Step-by-Step Process
- Remove the Old Screen: Start by taking the screen frame off the window. Use a screwdriver to take off any screws or clips. Then, pull out the old screen and throw it away.
- Prepare the New Screen: Put the new screen over the frame and cut it to fit, leaving extra space around the edges. It should be bigger than the frame for a good fit.
- Secure the Screen: Use the spline roller to push the spline into the grooves, holding the screen tight. Begin at one corner and go around, keeping the screen tight and smooth.
- Trim the Excess: After the screen is in place, cut off any extra material carefully. Make sure you don’t cut the spline or screen.
- Reinstall the Screen Frame: Put the frame back in the window. Attach any screws or clips again. Check to make sure the screen fits well and works right.

Refreshing Bathroom Caulking
Refreshing your bathroom’s caulking can stop water damage. It makes your bathroom look cleaner and more complete. It’s an easy DIY project that really improves your bathroom.
To begin, you must remove the old, moldy caulk. Use a utility knife or a caulk remover to do this. You need to cut the old caulk and pull it off. Then, clean the spot well with a bathroom cleaner and dry it before you add new caulk. This makes sure the new caulk will stick.
Next, put new caulk on the cleaned area. A caulking gun works best for this. This ensures the application is smooth. Smooth the caulk with a tool or a watered finger for a neat finish.
Let the caulk dry for a day before getting it wet. This simple project doesn’t just prevent water damage. It also makes your bathroom look new. Taking on easy home projects like this keeps your home lovely and working well.
Balancing Furnace Dampers
Balancing the dampers in your furnace helps your heating and cooling work better. This means your home can use energy more wisely.
Why it’s Beneficial
Adjusting your dampers makes your house comfy by keeping temperatures just right. It also cuts down on how much you pay for energy. By setting the dampers right, air goes where it’s supposed to, avoiding rooms that are too hot or too cold.
Tools Needed
Start by getting the tools together. You will need:
- Ladder
- Headlamp
- Philips head screwdriver
- Marker
- Notebook
Steps to Balance Your Dampers
- Locate the dampers: Find the dampers in your HVAC system. They’re usually by the furnace in the ductwork.
- Identify seasonal settings: Use a marker to show where the dampers are for summer and winter.
- Adjust for balance: Change the dampers to control airflow to certain places. Mark the new spots.
- Test airflow: Turn on your furnace or AC. Let it run until it’s steady, then check the air in each room.
- Make necessary adjustments: Keep adjusting dampers until the air flows well everywhere in your home.
By doing these steps, you make balancing your furnace dampers an easy but important energy-saving project. It boosts how efficiently your home uses energy and makes it more comfortable.
Conclusion
Trying DIY home projects can be fun and teach you a lot. Begin with easy tasks. Like changing cabinet knobs, painting walls, or fixing the bathroom caulk. You’ll save money and make your home nicer. Plus, you’ll feel proud of what you’ve done.
As you do more, try tougher projects. Like making a fire pit or putting up a TV on the wall. Each one makes your home better. And you learn useful skills for later projects. Start with simple ones. Then take on bigger challenges when you’re ready.
Want to fix furnace dampers or mend a window screen? These beginner DIY projects are perfect. They make your home better and teach you new things. Start with one small project. It could lead to many more. You’re on your way to being great at DIY.